![How To Merge Facebook Pages [Step By Step Guide]](https://nsouly.com/wp-content/uploads/2022/06/How-to-Merge-Facebook-Pages.jpeg)
How To Merge Facebook Pages [Step By Step Guide]
Learn exactly what you need on how to merge Facebook pages the right way!
Social media presence plays a vital role in any business, making it easier for the audience to follow you. But having multiple Facebook pages of the same business or nature can confuse your audience and followers.
Whether these pages were created by mistake or on purpose, merging them is the best way to create a seamless online presence. Here is how to merge Facebook pages.
Table of Contents
Merging Requirements For Facebook Pages
Before learning how to merge Facebook pages, Your Facebook account needs to meet these requirements:
- The pages’ names and the nature of the business must be the same.
- If it’s not the same, you can change it before start merging.
- You must be an admin of the pages you want to merge
- If the pages have addresses, then the physical location of the pages must be the same.
- Make sure the addresses, about section, and given contact information must match of merging pages
If your Facebook account lacks any of the requirements mentioned above, you will not be able to merge pages. Therefore, making sure your Facebook account ticks all the boxes is recommended.
What Will & Won’t Merge
Before we start on how to merge Facebook pages, knowing what will happen after a successful merger of your Facebook pages is important. Because once the merger process is complete, it will not be reversed.
What will Merge
These things will be not be deleted and moved to the newly merged page:
- Followers of pages will be merged. That does not mean that the number of followers will double.
- For example, if a follower likes both of your pages, they will be counted as a single follower after the merger.
- Check-ins from the pages will be merged.
What Will Not Merge
These things will not be moved from one of the pages to the merged page and will be lost in the process. It is important to note that some data will be lost during this process before learning how to merge Facebook pages.
- All the posts and photos of only one page will be shown on the merged page, and other page posts and photos history will be deleted
- Reviews and ratings of the only page will be shown on the merged page.
You will be able to select which page you want to keep, and all of the things mentioned above will be moved into it, and the rest will be deleted. If there is any post or photo you want to backup from the page that will be deleted, now it’s the best time.
Listing Pages
It is recommended that you have found and listed down all the pages associated with a single business or nature. To find which pages you are an admin of:
- Click/Tap in the top right of Facebook
- Click/Tap Pages
- Go to your Page and Tap ***More.
- Tap Edit settings and then tap Page Roles
From here, you can see your role on the listed pages. It is better to note down the followers and check-ins of pages that will be merged.
Make An Announcement
Although it is not a part of how to merge Facebook pages, it is necessary for your audience.
Most of the audience of multiple pages would already be confused about which page they should follow. Some audience likely follows one page, not the other, and merging these pages unannounced can add to this confusion.
To smooth this process, create a post on merging pages, tell the followers about the merging process and pin that post. Most will not see this pinned post if both pages have a large audience. Running a sponsored story or a Facebook ad can work in this situation.
Business Manager
The pages that will be merged should be part of the same Business Suite Account or Business Manager account. If they are not, you can add them to your business manager to start this process.
Avoid Security Issues
If possible, try the merging process from a laptop, computer, or mobile device you regularly use to access your pages. Accessing the device from a new device you’ve never used before is highly likely to run into security issues. Fix all the security issues before moving to how to merge Facebook pages.
How To Merge Facebook Pages – A Step By Step Guide
If you have gone through the mentioned points above and fit all the requirements, let’s start with how to merge Facebook pages with the following steps:
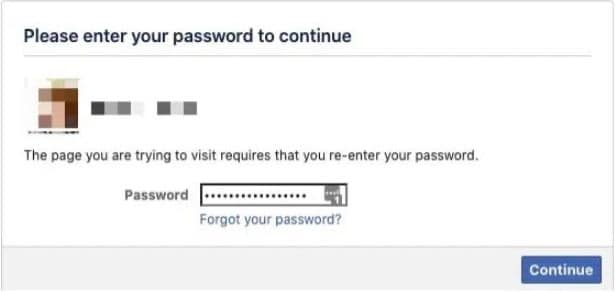
- Go to this page
You will be required to enter the password of your personal Facebook account.
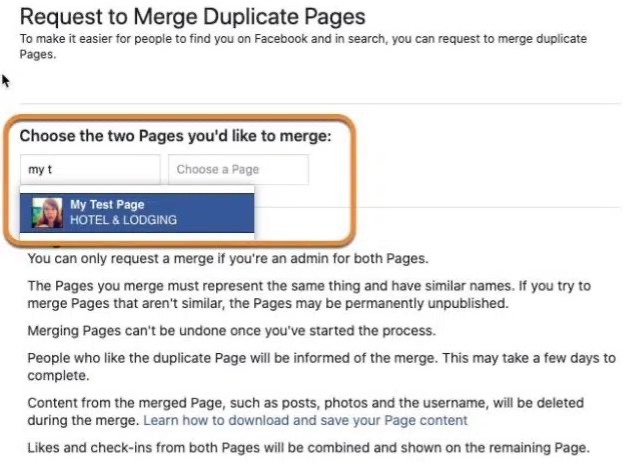
- Select the pages you want to merge from the list
If too many pages are linked to your account, you can type the page name that needs merging and click/tap on it. Then click continue.
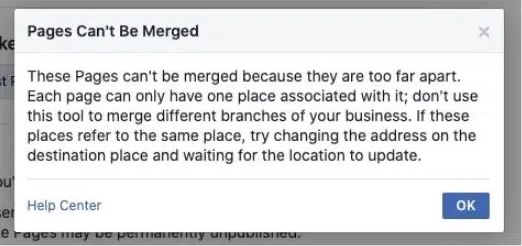
If you run into some error during merging, a popup will appear in which solution will be mentioned by Facebook.
- Now, Facebook will ask you about the page you want to keep. From there, click on the dropdown menu. You can select the page’s name from the list. Next, click on “Keep Page” to confirm.
- Facebook will send you a confirmation popup. Once you confirm the merge, you are all set.
You might be thinking that these steps were easier than expected. Well, merging Facebook pages is quite simpler. However, that’s only to say if things go smooth. Sometimes, Facebook will reject your merge request.
There are many reasons why it happens. Thankfully, Facebook has mentioned all of them. So, if your request was rejected, you can fix the issue and start again.
Reasons Why Facebook Can Reject Your Merge
Same Names
If both pages have the same name, you can not merge them. Facebook has a strict policy regarding this situation. In fact, it does not allow you to merge pages that have similar names.
For instance, one of your pages is named Food Block, while the other is named The Food Block. These are still similar names, and Facebook can detect them. If that’s the issue, try changing the name of one page. Make it completely different from the other page, such as The Foodie Corner.
Similar Information
If your pages have similar information, that is another reason to be rejected. Merging requires two pages with different details. What does information mean? Well, it can include everything, from the bio to the current location.
The solution to this problem is the same as the first one. Change the information to make it quite different from the other page. Pay attention to all small details and change them to avoid rejection.
Published Pages
It is the most common reason for merging rejection. Mostly, people opt for merging their published pages. However, Facebook doesn’t allow you to merge published pages. The prerequisite is to have unpublished pages.
And that is where the solution lies. If you face this issue, try to unpublish both your pages. Then, request a merge and see if it works.
Same Business Manager Account
Are both of your pages part of the same business manager account? If so, that’s another reason Facebook may have rejected your request to merge. You will need to have different pages with different manager accounts.
In short, Facebook does not allow the merging of similar pages. Whether the name, information, or manager account, the requirement is to have some degree of difference.
Before moving to how to merge Facebook pages, You can solve all these issues instantly. Hopefully, it will work this time.
Do This After Merging Your Facebook Pages
Now, we are way past the stage of how to merge Facebook pages. It’s time to see what to do after.
Once your Facebook pages are merged, your audience will be left confused. The first thing to do is to post a public announcement. Write a big post to explain what has happened. It is extremely important to keep and gain more customers if you are a business owner.
Secondly, you have to work to verify your Facebook page. Why? Because it would clear all doubts from your followers. Plus, a single verified page will attract more followers. Do you not know how to do that?
Well, here are a few steps on how to verify your Facebook page:
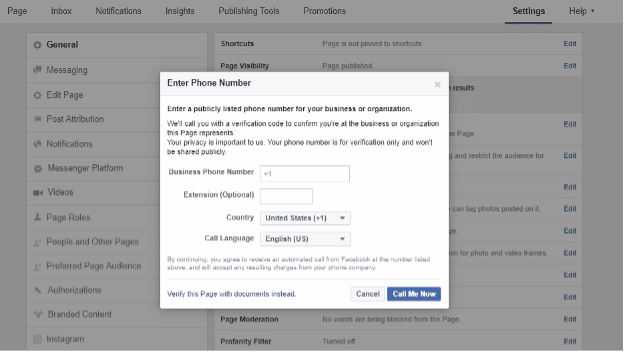
- Go to Settings, and select General.
- Click on Page Verification, then on “Verify this Page.”
- It will ask for some necessary information, such as your phone number, language, and country.
- After entering the information, you can choose to receive the confirmation code via call or SMS.
- Enter the code, and click on Continue.
Business-Related Page
If your page is business-related, you can verify your business/company documents. It is a quicker way to verify your Facebook page.
Once you have verified your page, your audience will find it easier to connect with you. Your old customers can stay intact, while you can gain new ones too.
Now, it’s time to make a content plan. Posting content on two pages can be different from posting on a single verified page. For that, you will have to be more consistent. So, plan your content ahead of days and weeks.
At last, you can answer all the questions you receive from your customers. For instance, many people will ask you about the page merge. You can answer them why it happened. After all, engaging with your followers will increase your page’s following.
Conclusion
And that’s all you need to know on How to merge Facebook pages. Yes, the process is quite easy. However, there are some prerequisites to fulfill before going for the merge request. Make sure your pages follow all the rules and regulations provided by Facebook.
There are various benefits of merging Facebook pages. But, most importantly, you will notice exponential growth in terms of followers. That will be mainly due to the focus shift on a single entity rather than multiple.